Daring Bakers' Graham Crackers and Nanaimo Bars with a Twist
The very first post in a new year is the hardest one to write. It seems it supposed to be deep, meaningful and set the mood for the year to come.
To my frustration I had nothing that would live up to such expectations and I've been procrastinating with the first post of the year for almost a month now.
I had a really nice break over the holidays; I was learning to ski downhill and had no time to reflect on how bad the previous year was and get my hopes up for next year.
I've actually decided to take it slow this year by making just one simple and easy to follow new year's resolution: "no resolutions, just do what needs to be done" and I must say it's been working very well for me thus far. I've been checking off things from my to do list left and right, things that have been on that list for months.
It's invigorating to see some of those things get finally resolved and makes you want to get the rest of them off the list as well.
While I've been busy getting things done and checking them off my list this month's Daring Bakers' challenge wasn't even going to make it to the list at first.
When the 1st of the month rolled in I was pretty disappointed to see graham crackers and graham crackers-based dessert, Nanaimo Bars, as our January challenges. I was on the fence for a good while, but in the end "I don't want to bake this dessert" just wasn't good enough of a reason not to do it and on top of that I was in dire need for some material for a blog post. I needed something that would get me going again.
It was decided, these words:
The January 2010 Daring Bakers' challenge was hosted by Lauren of Celiac Teen. Lauren chose Gluten-Free Graham Wafers and Nanaimo Bars as the challenge for the month. The sources she based her recipe on are 101 Cookbooks and www.nanaimo.ca.
would become a part of my fist post for 2010.
By the time I reached the conclusion that the Daring Bakers' challenge falls into the "what needs to be done" category the third week of January was almost half-way over. With three weeknights to bake and two weekend mornings to photographs there wasn't too much room for error; everything had to go pretty smoothly.
The plan was to make the dough on Wednesday night, roll it out and bake Thursday night and Friday night make the Nanaimo Bars; this way, by Saturday morning I would have something ready for the photo shoot.
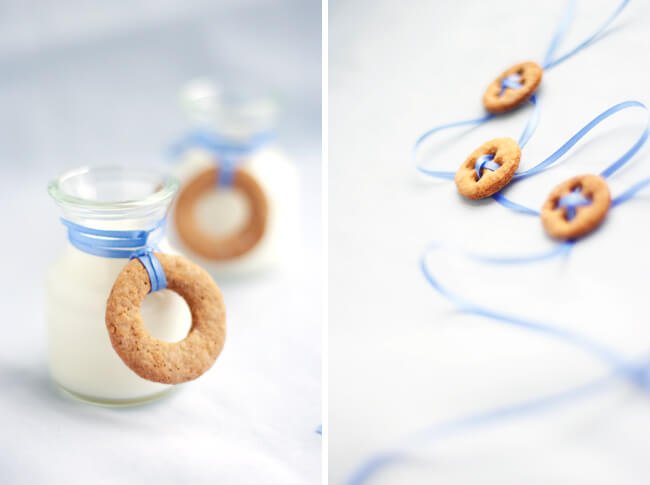
Luckily I've had most of the ingredients in my pantry and the only thing I had to do without was vanilla custard powder. I've never seen it being used in recipes before so, I had no idea where I could use the rest if I buy a whole box of it.
The word on the Web is that you can substitute custard powder with cornstarch, but since I'm not a big fan of cornstarch that did not seem like a good idea to me.
So, that's where the twist comes in: I substituted the middle layer entirely by crème anglaise with a tiny bit of gelatin mixed in, just enough to help it keep its shape. For my Nanaimo Bars, I've left off the top layer since I was mainly interested to see if the substitution for the middle layer would work and it did!
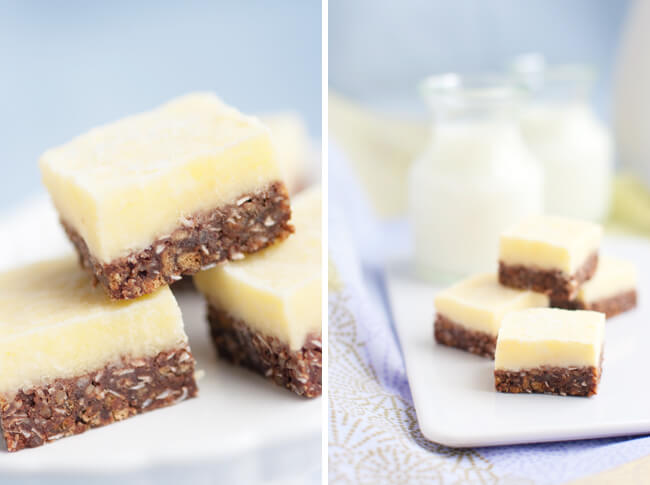
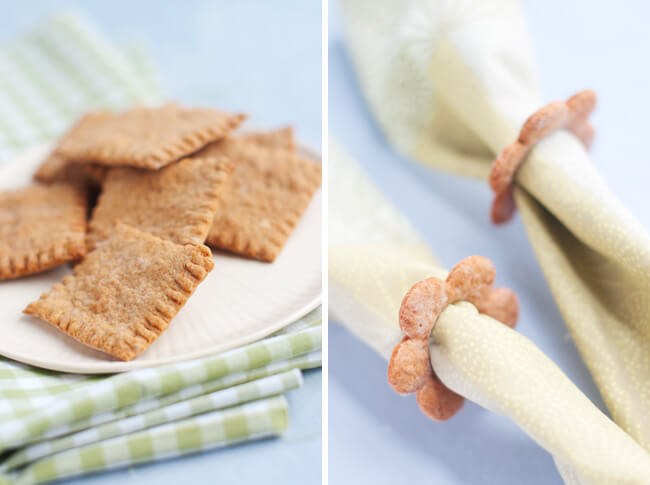
I must say I had a ton of fun with graham crackers, both baking and styling, and from now on I am a huge fan of the homemade graham crackers. As to Nanaimo Bars, I think they are just too much of a hassle, but I'm glad I've at least tried to make them.
For Graham Crackers I've used the recipe from 101 Cookbooks and the recipe for Nanaimo Bars as I've made them is just below.
Nanaimo Bars with a Twist
Ingredients:
- Bottom Layer:
- 2 oz unsalted butter
- 2 Tblsp vanilla sugar
- 3 Tblsp unsweetened cocoa
- 1 large egg, beaten
- 1/2 cup + 2 Tblsp Graham Crackers crumbs
- 1/4 cup almonds, finely chopped
- 1/2 cup coconut, shredded, unsweetened
- Middle Layer:
- 1 1/4 cup whole milk
- 3 egg yolks
- 2 Tblsp caster sugar
- 5 g powdered gelatin
- Top Layer:
- 2 oz semi-sweet chocolate
- 1 Tblsp unsalted butter
Directions:
- Bottom Layer:
- Melt unsalted butter, sugar and cocoa in a double boiler.
- Add egg and stir to cook and thicken. Remove from heat.
- Stir in crumbs, nuts and coconut.
- Press firmly into an ungreased pan, covering the bottom of the pan completely.
- Middle Layer:
- Pour the milk into a double boiler and heat slowly until almost boiling; take off the heat.
- Whisk the egg yolks and sugar together in a bowl until pale yellow. Gradually whisk in the hot milk and then strain back into the pan.
- Cook over a low heat, stirring constantly for 10-20 minutes until the custard is thick enough to lightly coat the back of a wooden spoon.
- Sprinkle gelatin over cold water and let it stand for 5-10 minutes. Heat gently, stirring until dissolved. Add into the custard and stir well.
- Spread the custard over bottom layer and chill until it sets.
- Top Layer:
- Melt chocolate and unsalted butter over low heat. Cool.
- Once cool, pour over middle layer and chill.
- Esculent, Recipes, Portrait, USA, Daring Bakers
January 27, 2010
what's new
✚ Observer project is currently ongoing.
Revealing one image a week.
✚ Eremic Exuberance project is up as part of the Projects page and is currently ongoing.
✚ Brewed Awakenings exhibition is up in the Lightful Imagery Gallery till June 23rd, 2025.
✚ On the go II exhibition preview is currently ongoing.
New images are revealed in the monthly newsletter.
Sign up for the newsletter to follow along.
recent
you might also like...
selected prints
STAY IN TOUCH
Sign up to receive monthly updates on new images, new art prints, new exhibitions, new projects, exhibition previews and art print sales right in your Inbox to be enjoyed at your leisure.
SUPPORT
ARCHIVE
- All (575)
Categories:- Abstract (161)
- Black & White (52)
- City (123)
- Details (45)
- Esculent (43)
- Exhibitions (12)
- Fauna (5)
- Flora (326)
- Interior (7)
- Landscapes (11)
- Macro (233)
- Recipes (9)
- Reflections (46)
- Sky (3)
- Still (31)
- Waterscapes (24)
Format:- Landscape (192)
- Portrait (221)
- Square (150)
Places:- Canada (8)
- Czech Republic (2)
- Denmark (6)
- England (2)
- France (4)
- Israel (5)
- Italy (1)
- Norway (7)
- South Africa (1)
- Spain (13)
- Sweden (21)
- USA (484)
Series:- Colors of the Desert (14)
- Cutlery Improvisations (10)
- Daring Bakers (13)
- New Mexico: Arts & Crafts (9)
- Tulip Abstractions (8)

